What is iClicker Cloud?
iClicker Cloud is a cloud-based student response system (SRS) that has been integrated with D2L. iClicker Cloud allows instructors to:
- Track attendance using GPS technology
- Ask targeted (heat map) questions
- Conduct polling
- Administer quizzes
The newly integrated SRS allows students to participate in-class from any computer or mobile (Android or Apple) device. Instructional videos detailing what iClicker Cloud is and how it can help instructors enhance classroom engagement can be found on the official iClicker YouTube channel.
iClicker Cloud - Getting Started:
Start by downloading the iClicker Cloud software. After you've downloaded and installed the software, create an iClicker Cloud account, or sign in if you've already created an account. After your account has been created, you can begin the process of creating your course in iClicker Cloud. Detailed instructions for this process, including an instructional video on how to create a course, can be found on the iClicker YouTube channel.
Connect iClicker Course to D2L Course
- Log in to your iClicker Cloud course and open Settings. Click the Integrations tab.
- Click the Connect to Brightspace button. (If you do not see the image below but instead see references to an LTI link, you are in an old course and need to create a new iClicker course.)
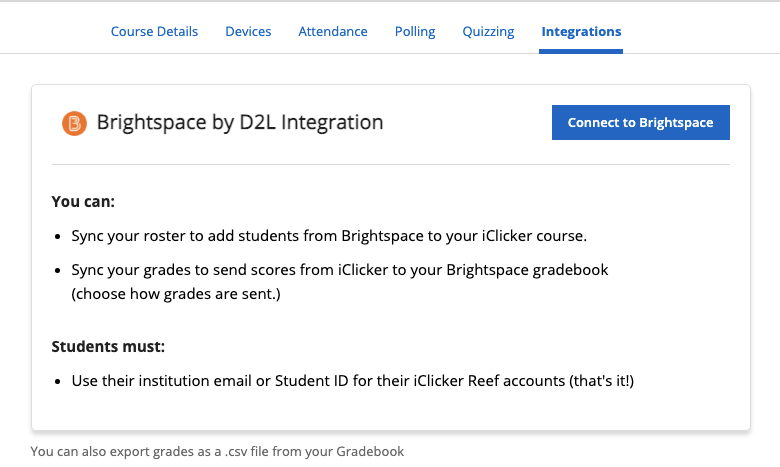
- The first time you go through this setup, you’ll see a notification that you need to authenticate with Brightspace (D2L). Click Go to Brightspace.
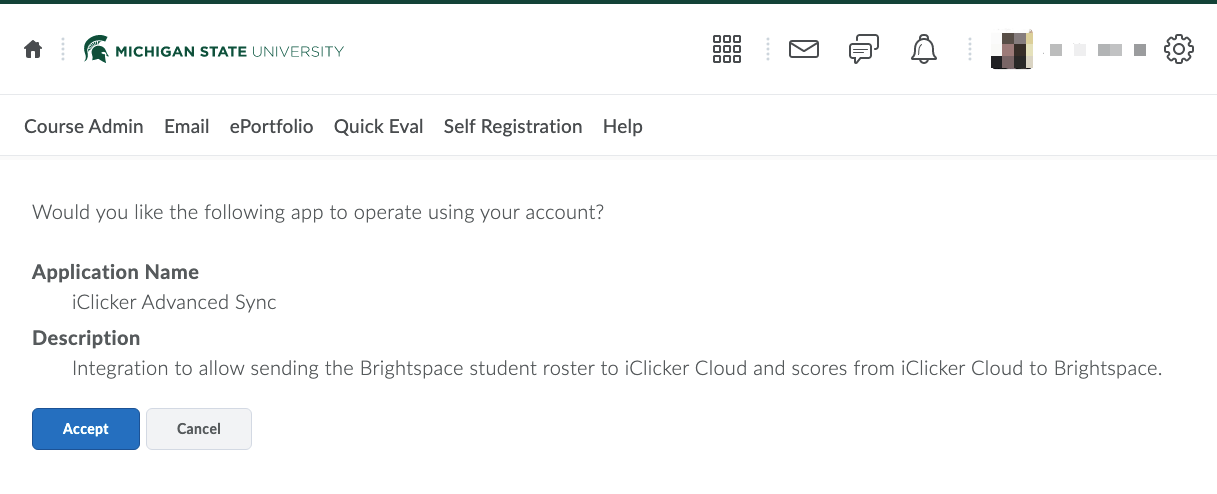
- You will be directed to D2L. Click Accept.
- Back in the iClicker settings, choose your D2L course from the list and click Next.
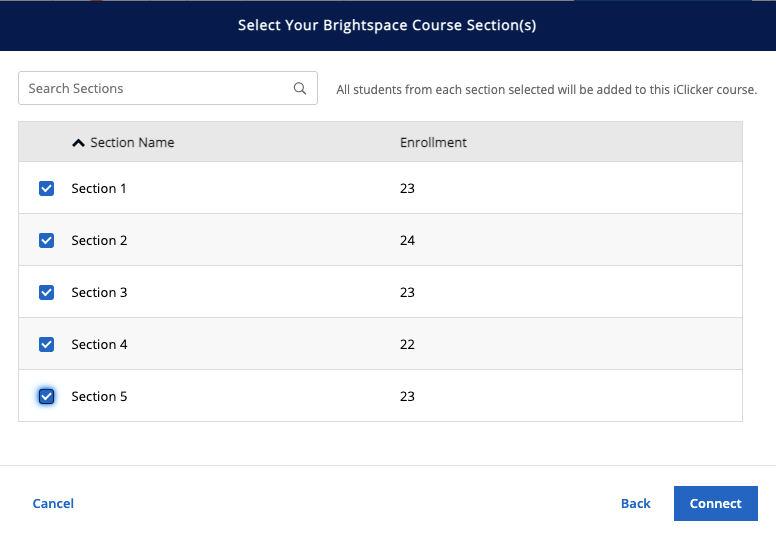
- If your D2L course has sections: Choose the sections you want to sync to this iClicker course. Note that iClicker recommends creating a separate iClicker course for each section, since iClicker does not retain the section enrollment information and students cannot be filtered by section in the iClicker roster. You can create one iClicker course and include all sections, but students' grades in iClicker will not be accurate with this option. (Either way, syncing grades to D2L will become complicated, so be sure to read through the instructions on the Send iClicker Grades to D2L page.)
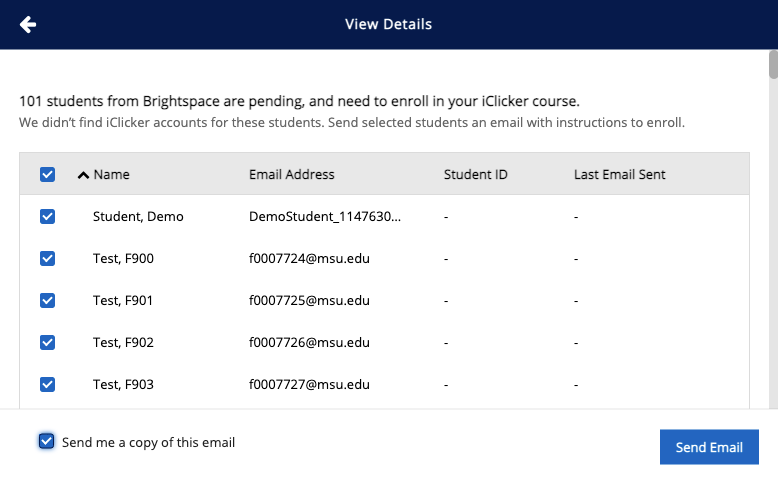
- Choose to either Sync Roster Now or Sync Roster Later (from the People tab). When you sync the roster, students will receive an email from iClicker that they have been added to your course if they already have an iClicker account. To see the students who do not yet have an account, click View Details.
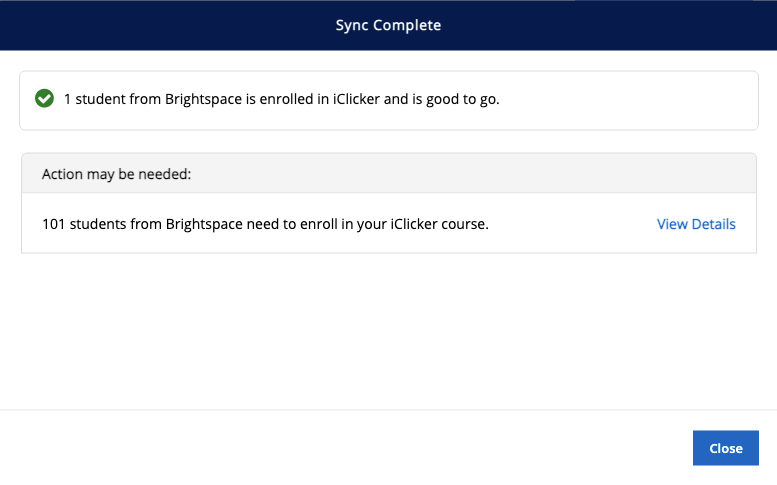
- Bulk email the students who do not yet have an iClicker account by selecting all the students and clicking Send Email. Then click the back arrow to return to the previous screen.
- Click Close.
- A summary of the setup is shown and you can choose your grade sync options. You can ignore these options if you are using iClicker for attendance only.
You can either have iClicker scores sent as a total, combined score in one grade item (with the name of iClicker Grade) or you can have individual scores sent as separate grade items to the Brightspace D2L gradebook (with the name of the session). Students with no responses can either receive a 0 automatically or no score in the Brightspace D2L gradebook.
Even if you choose no score for the second option, the scores can automatically become 0 if you select "Treat ungraded items as 0" in your D2L gradebook settings. Go to Assessments > Grades > Settings > Calculation Options.
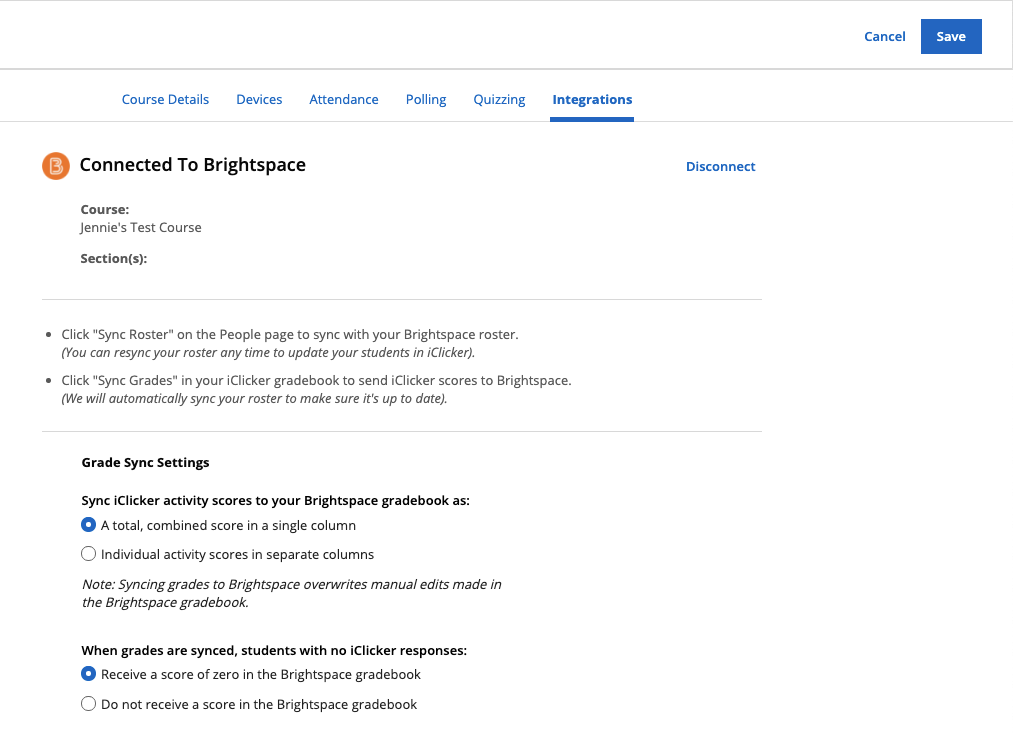
NOTE: If you have sections in your D2L course, you will need to run separate sessions in iClicker for each section and manually edit the grade items in your D2L gradebook after syncing in order to avoid deflating students' grades. If you choose Do not receive a score in the Brightspace gradebook for the second option above, you run the risk of accidentally inflating some grades if the default "Exclude ungraded items" is selected in your D2L gradebook settings. More detailed instructions are on the Send iClicker Grades to D2L page.
- Click Save in the top right corner.
Additional Resources
https://tech.msu.edu/service-catalog/teaching/student-response/iclicker/