Gradebook

Why use the D2L Gradebook?

Students are accustomed to having regular, up-to-date access to their current course grades and seek timely feedback about their status and overall learning gains. The grade book in D2L provides certainty about their status in a course, increasing engagement. An up-to-date grade book keeps the course top-of-mind in an otherwise busy schedule, functioning like a weekly one-on-one meeting with a supervisor in the workplace, serving as a regular motivator for consistent engagement in the course.
Jump to instructions
 

check-green

Track Progress and Learning Outcomes

Students are accustomed to regular, up-to-date access to their current course grades; they seek timely feedback about their status and their overall learning gains

check-green

Clarity on Course Progress

The grade book provides certainty about status in a course, increasing students’ engagement   

check-green

Course Prioritization

An up-to-date grade book keeps the course top-of-mind in an otherwise busy schedule

check-green

Boosts Student Engagements

Like a weekly 1-1 meeting with a supervisor in the workspace, gradebook access functions as a regular motivator for consistent engagement in the course 

How to use the gradebook

Set up Grade Book Settings

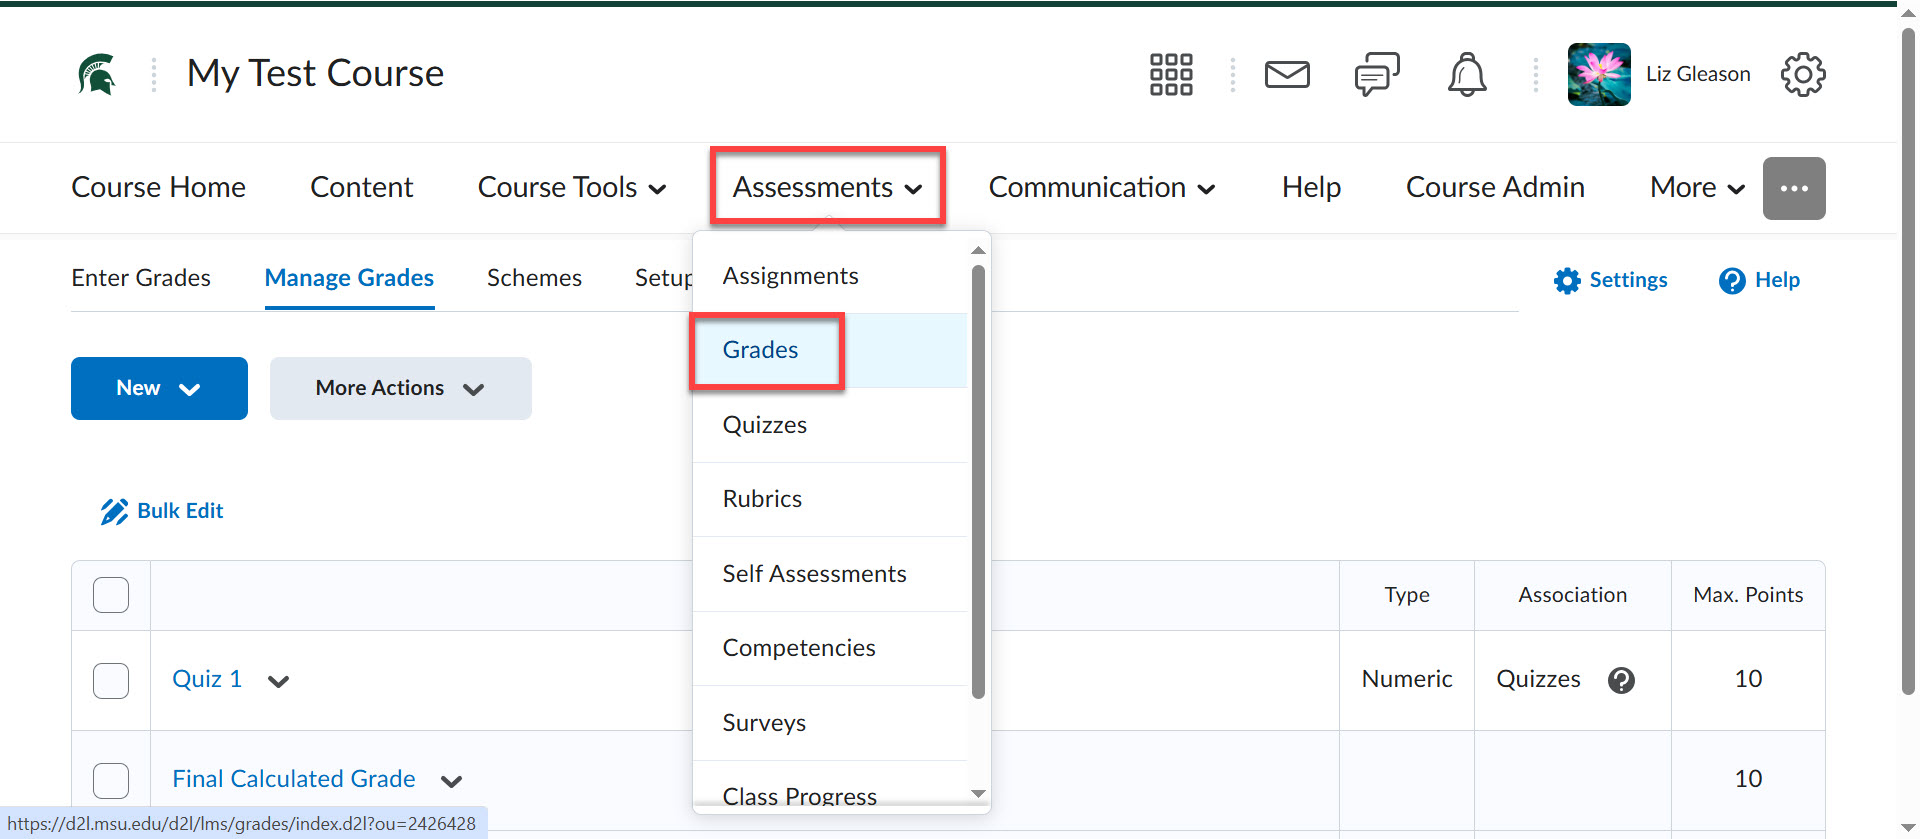
  1. Click Assessments in the navigation bar in your course and select Grades.
  2. Go to the Setup Wizard tab and click Start at the bottom of the screen.
  3. Select either a Points or Weighted grading system. The Points grading system is selected by default.
  4. Click Continue on each screen and choose your desired settings for each step or simply accept the default settings. Click the question mark icon for a description of each setting.

Create Grade Categories

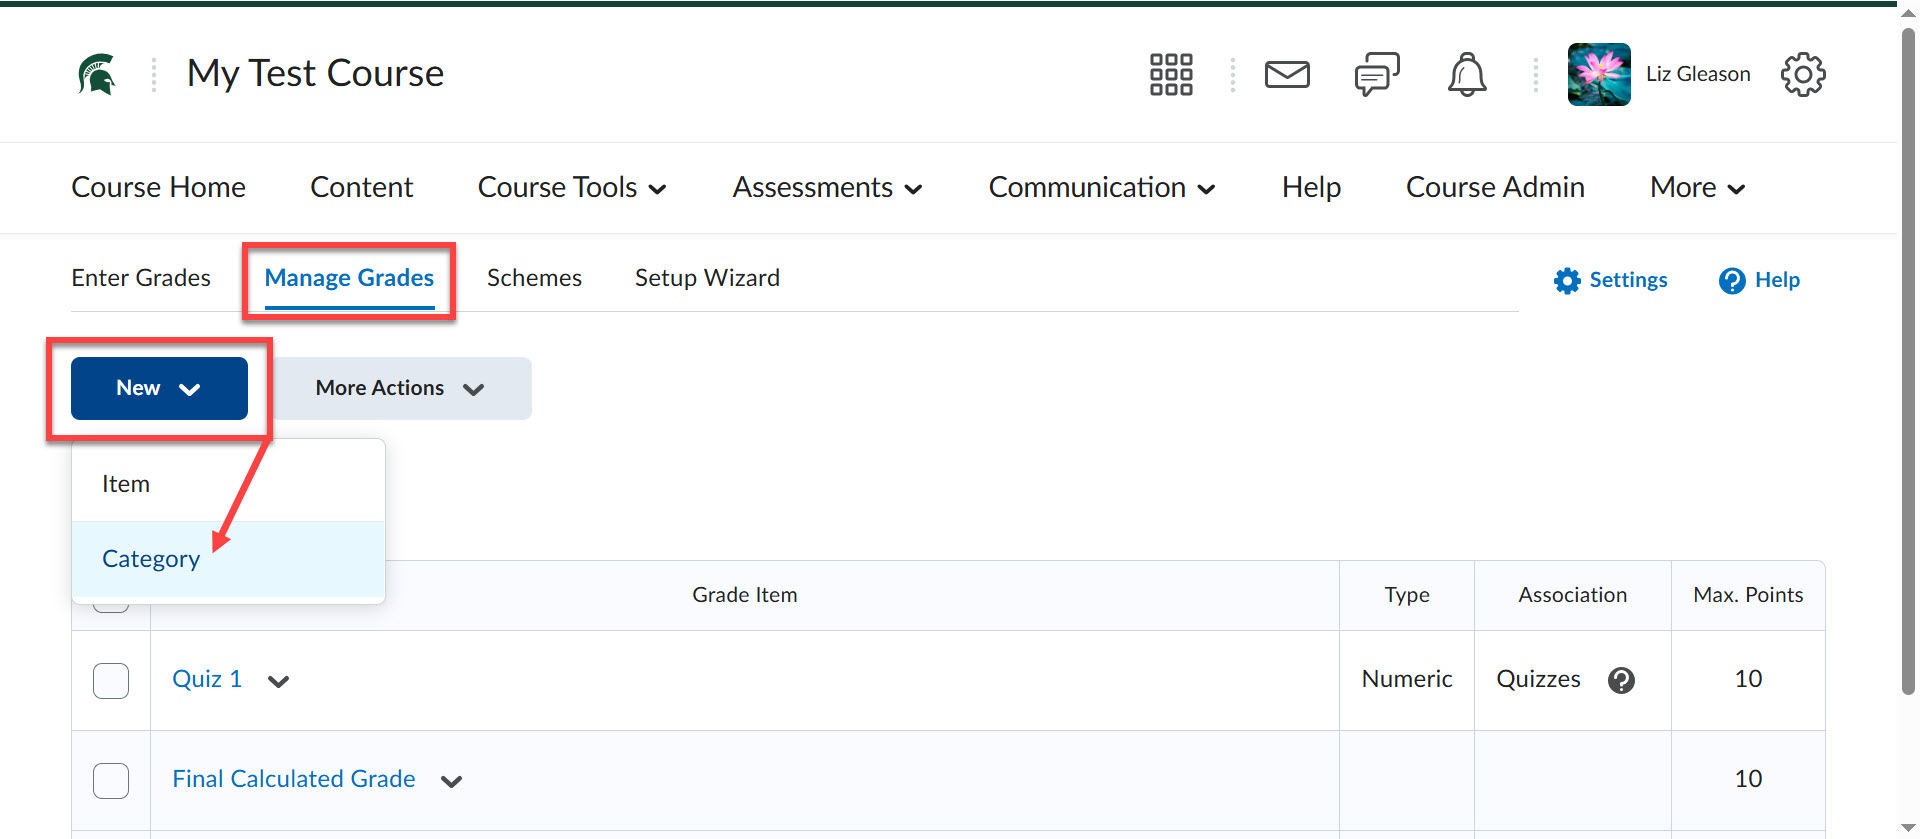
  1. Go to the Manage Grades tab, click the blue New button, and select Category.  
  2. Enter a Name for the category.
    1. If you are using a weighted gradebook, assign a weight to the category.
  3. Click Save and New to continue creating more categories or click Save and Close.

Create Grade Items

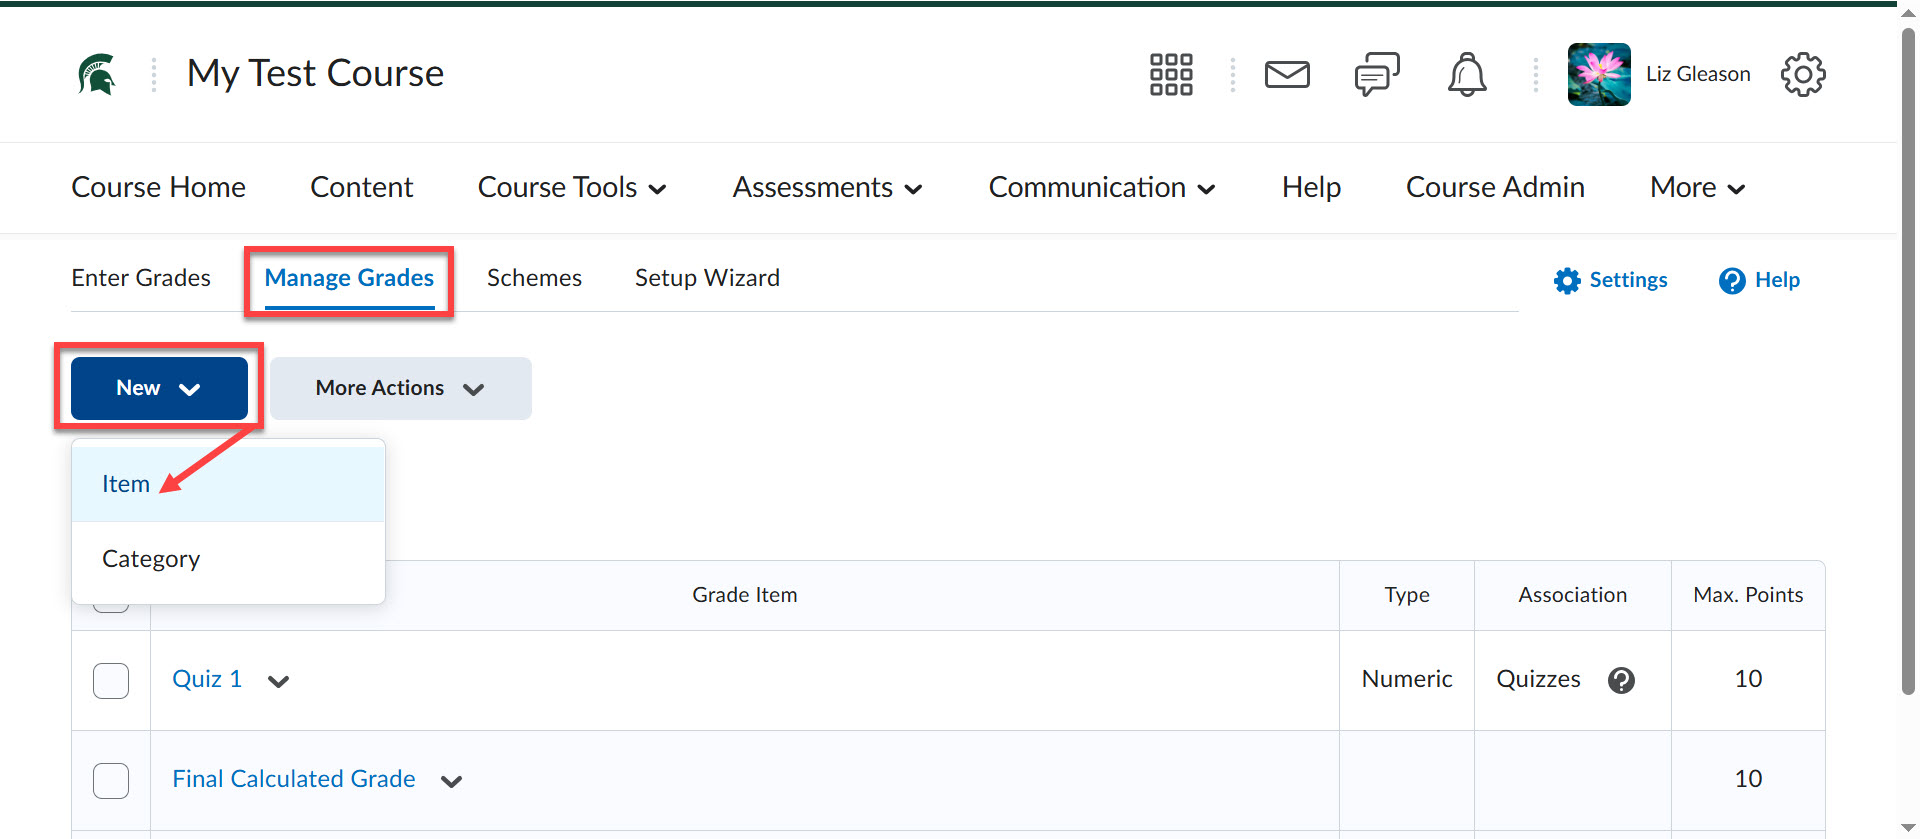
  1. On the Manage Grades page, click the blue New button, and select Item.  
  2. Choose Numeric and enter a name and maximum points for the grade item.
  3. Choose a Category to place the item into, if necessary.
    1. If you are using a weighted gradebook and assigning weights manually, set a weight to the item.    
  4. Click Save and New to continue creating more grade items or click Save and Close.